Cheese Board
Looking to impressyour guests with minimal effort? A cheese board is one of the easiest and moststunning ways to entertain—perfect for girls’ night, holiday parties, or a cozyevening at home. With just a few thoughtful additions, you’ll have a spread that’sboth delicious and photo-worthy.Here’s how to make a cheese board that’s equal parts effortless and elegant!
Equipment
- Serving board Wood or Marble works excellent
- Small Cheese Knives
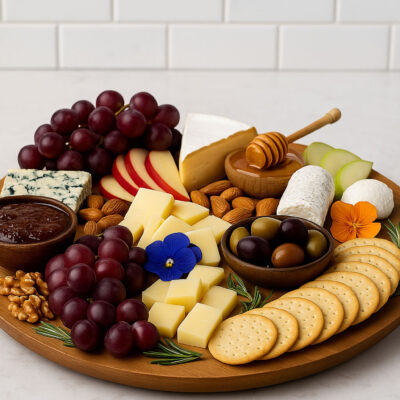
Ingredients
- Choose 2–3 cheeses and your favorite pairings from each category below.
- Cheeses 2–3 varieties:
- White Cheddar
- Gouda
- Brie
- Goat Cheese plain or herbed
- Manchego
- Blue Cheese optional
- Fruits:
- Red or green grapes
- Apple or pear slices
- Dried apricots or figs
- Crunchy Items:
- Crackers
- Crostini
- Candied or roasted nuts
- Sweet & Salty Add-ons:
- Fig jam or honey
- Olives
- Cornichons
- Garnish: Optional:
- Fresh rosemary or thyme
- Edible flowers
- Extras:
- Small cheese knives
- Wooden or marble serving board
Instructions
- Wash and slice fresh fruit; pat dry.
- Pre-slice firm cheeses for easy grabbing.
- Place cheeses on the board first, spaced out.
- Fill in with crackers, fruit, nuts, and condiments.
- Tuck herbs and garnishes in open spaces for color.
- Use small bowls for wet items like olives or jams.
- Let it look full and a little messy—it’s more inviting!
- Set out cheese knives and spreaders for soft cheeses.
Notes
Tip:
There’s no wrong way to build a cheese board! Mix flavors, colors, and textures for the most satisfying (and photogenic) experience.