
This post may contain affiliate links. We may earn a commission when you purchase through links on this site at no additional cost to you.
Some days call for a dessert that feels cheerful without being complicated. One Thursday after work turned unexpectedly social when a school fundraiser meeting popped up, and I realized I needed something sweet—and fast. Homework was spread across the kitchen table, my daughter was scrolling through dessert ideas on her phone, and my husband was already checking the pantry as if it might magically solve the problem.
I wanted something playful but not fussy. Pink felt just right: bright, fun, and enough to make everyone pause and smile after a long day. Cookie dough always disappears faster than baked cookies in our house, and brownies have never let me down. Combining the two felt like an easy kitchen experiment worth trying.
The recipe
Pink Cookie Dough Brownie Bites
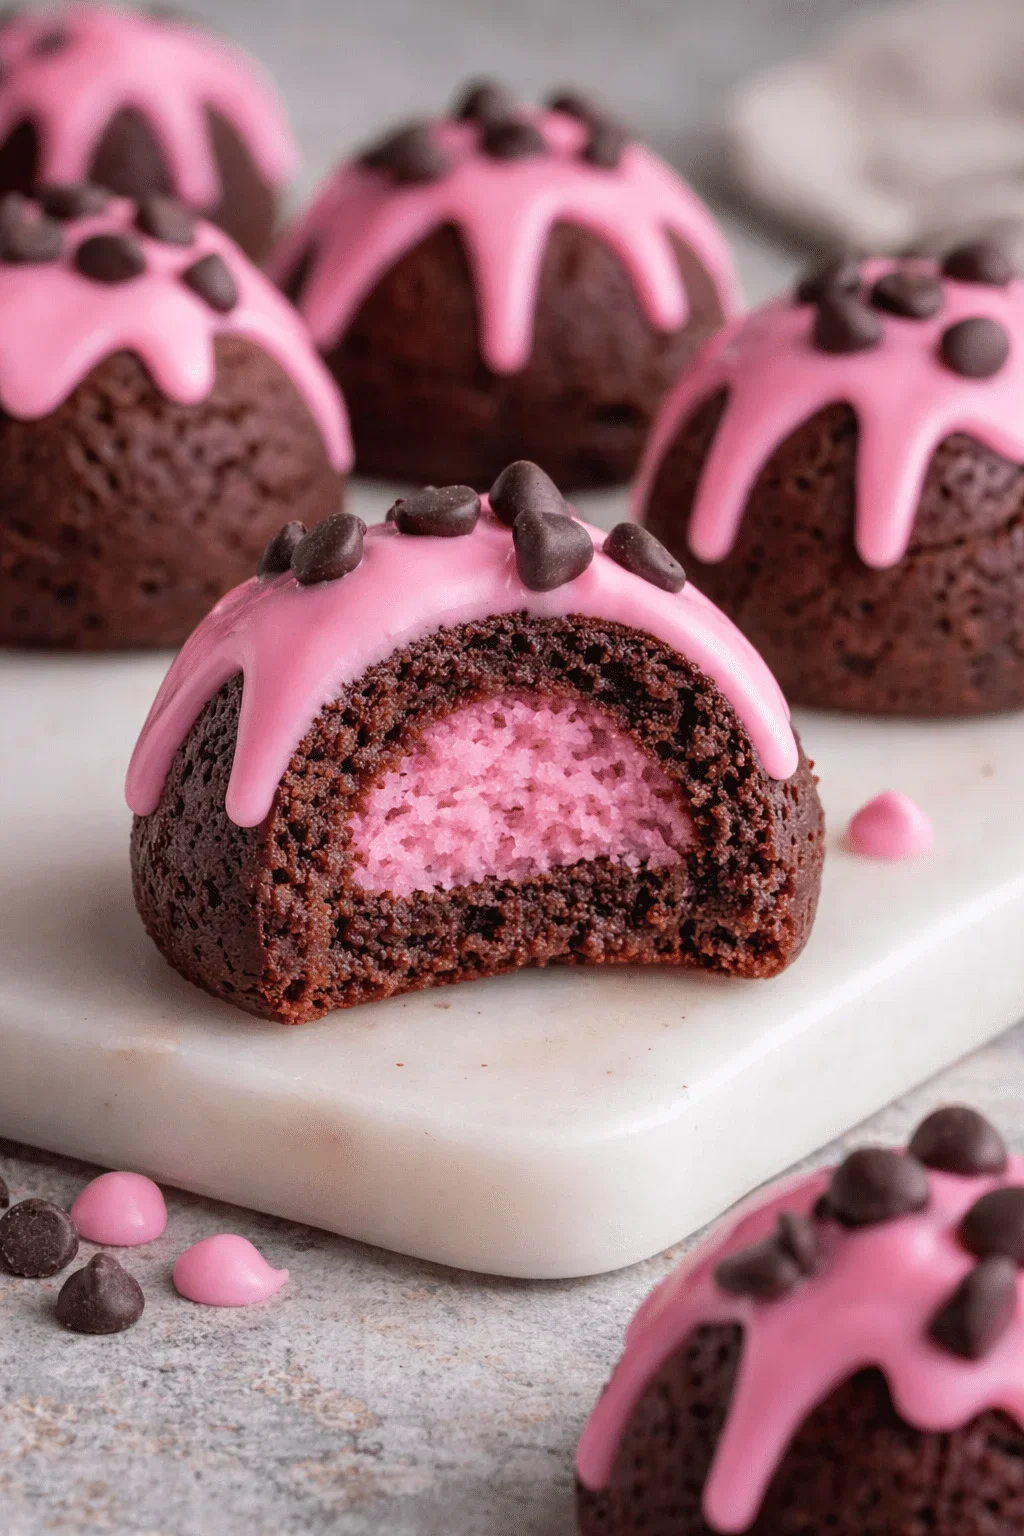
Pink cookie dough brownie bites are layered treats made with fudgy pink brownie rounds, soft egg-free chocolate chip cookie dough domes, and a sweet pink glaze. They are playful, bite-sized, and perfect for sharing.
Ingredients
Pink Brownie Base
- 1/2 cup unsalted butter, melted
- 1 cup granulated sugar
- 2 large eggs
- 1 teaspoon vanilla extract
- 1/3 cup unsweetened cocoa powder
- 1/2 cup all-purpose flour
- 1/4 teaspoon salt
- Pink gel food coloring, as needed
Cookie Dough Domes
- 1/2 cup unsalted butter, softened
- 1/2 cup brown sugar
- 1/4 cup granulated sugar
- 2 tablespoons milk
- 1 teaspoon vanilla extract
- 1 cup all-purpose flour
- 1/2 cup mini chocolate chips
Pink Glaze
- 1 cup powdered sugar
- 2 to 3 tablespoons milk
- Pink food coloring, as needed
- Pink candy melts or pink chocolate chips, for topping
Instructions
- Preheat the oven to 350°F (175°C). Line a square baking pan with parchment paper.
- Whisk the melted butter and granulated sugar until smooth. Add the eggs one at a time, then stir in the vanilla.
- Sift in the cocoa powder, flour, and salt. Add pink gel food coloring and mix until smooth.
- Spread the batter evenly in the prepared pan. Bake for 18 to 20 minutes, until the top is set and a toothpick inserted in the center comes out with a few moist crumbs. Cool completely.
- Lift the brownies from the pan and cut them into thick rounds with a cookie cutter.
- Cream the softened butter, brown sugar, and granulated sugar until fluffy. Mix in the milk and vanilla, then fold in the flour and mini chocolate chips.
- Shape the cookie dough into smooth domes and freeze for 20 minutes, or until firm.
- Place one chilled cookie dough dome on each brownie round and press gently to attach.
- Mix the powdered sugar with 2 tablespoons of milk and pink food coloring. Add more milk 1 teaspoon at a time until the glaze is thick but pourable.
- Spoon the glaze over the bites and add pink candy melts or chocolate chips. Chill for 15 minutes, or until set.
Notes
- Let the brownies cool completely before cutting them into rounds.
- If the cookie dough is too sticky to shape, chill it briefly or add flour 1 tablespoon at a time.
- The exact yield will depend on the size of the cookie cutter and cookie dough portions.
- Store finished bites in an airtight container in the refrigerator for up to 4 days.
Dessert · American · Easy
As the oven warmed, the house settled into that familiar calm that comes from mixing batter at the end of a busy day. The kids debated how pink was too pink, a spoonful of cookie dough mysteriously went missing, and by the time the brownie bites were chilling, I already knew this was one of those recipes people would ask for later.
These pink cookie dough brownie bites are layered, playful, and perfect for sharing—the kind of dessert that quietly steals the spotlight.
Why You'll Love This Recipe
Fudgy brownie bases with soft cookie dough topping
Egg-free chocolate chip cookie dough
Bite-sized and easy to serve
A fun pink dessert for parties, holidays, and bake sales
Simple steps that fit into busy evenings
What Are Pink Cookie Dough Brownie Bites?
Pink cookie dough brownie bites are layered treats made with fudgy pink brownie rounds, soft egg-free chocolate chip cookie dough domes, and a sweet pink glaze. They are playful, easy to customize, and just the right size for sharing.
Ingredients
Pink Brownie Base
1/2 cup unsalted butter, melted
1 cup granulated sugar
2 large eggs
1 teaspoon vanilla extract
1/3 cup unsweetened cocoa powder
1/2 cup all-purpose flour
1/4 teaspoon salt
Pink gel food coloring, as needed
Cookie Dough Domes
1/2 cup unsalted butter, softened
1/2 cup brown sugar
1/4 cup granulated sugar
2 tablespoons milk
1 teaspoon vanilla extract
1 cup all-purpose flour
1/2 cup mini chocolate chips
Pink Glaze
1 cup powdered sugar
2 to 3 tablespoons milk
Pink food coloring, as needed
Pink candy melts or pink chocolate chips, for topping
Equipment
Mixing bowls
Whisk
Spatula
Square baking pan
Parchment paper
Round cookie cutter
Small cookie scoop
Optional: half-sphere silicone mold
How to Make Pink Cookie Dough Brownie Bites
Step 1: Make the Brownie Base
Preheat the oven to 350°F (175°C). Line a square baking pan with parchment paper, leaving enough overhang to lift out the brownies easily.
In a large bowl, whisk the melted butter and granulated sugar until smooth and glossy. Add the eggs one at a time, whisking well after each addition. Stir in the vanilla extract.
Sift in the cocoa powder, flour, and salt. Add pink gel food coloring and mix until the batter is smooth and evenly colored. The batter should be thick but pourable.
Step 2: Bake the Brownies
Spread the batter evenly in the prepared pan. Bake for 18 to 20 minutes, or until the top looks set with a slight sheen and a toothpick inserted in the center comes out with a few moist crumbs.
Let the brownies cool completely before removing them from the pan. Once cooled, lift them out using the parchment paper and cut thick rounds with a cookie cutter. If the brownies crumble, let them cool a little longer before cutting.
Step 3: Make the Cookie Dough
In a mixing bowl, cream the softened butter, brown sugar, and granulated sugar until light and fluffy. Add the milk and vanilla extract, then mix until combined.
Gradually fold in the flour, then stir in the mini chocolate chips. The cookie dough should be soft but firm enough to hold its shape.
Step 4: Shape the Domes
Use a small cookie scoop to portion the dough. Shape each portion into a smooth dome using your hands or a half-sphere silicone mold.
Place the cookie dough domes on a parchment-lined tray and freeze for 20 minutes, or until firm.
Step 5: Assemble the Brownie Bites
Place one chilled cookie dough dome on top of each brownie round. Press down gently so the two layers hold together without flattening the dome.
Step 6: Add the Pink Glaze
In a small bowl, mix the powdered sugar with 2 tablespoons of milk and a drop of pink food coloring. Stir until the glaze is thick but pourable. If needed, add more milk 1 teaspoon at a time.
Spoon the glaze over each bite, allowing it to drip naturally down the sides.
Step 7: Decorate and Chill
Top the bites with pink candy melts or pink chocolate chips while the glaze is still wet. Chill for 15 minutes, or until the glaze has set.
Serve slightly chilled or at room temperature.
Tips for the Best Brownie Bites
Do not overbake the brownies. Remove them while the centers are still slightly soft so they stay fudgy.
Cool before cutting. Completely cooled brownies hold their shape better when cut into rounds.
Chill sticky cookie dough. If the dough feels too soft to shape, refrigerate it briefly.
Start with a thick glaze. Add milk slowly so the glaze does not become too runny.
Freeze the domes before assembling. Firm cookie dough is easier to handle and keeps its rounded shape.
Common Mistakes and How to Avoid Them
Dry brownies: Pull them from the oven when a toothpick comes out with a few moist crumbs rather than waiting for it to come out completely clean.
Sticky cookie dough: Chill the dough briefly or add flour 1 tablespoon at a time until it is easier to shape.
Runny glaze: Mix in a little more powdered sugar until the glaze reaches the right consistency.
Misshapen domes: Make sure the cookie dough is firm before assembling the bites.
Recipe Variations
Chocolate Lover's Version: Skip the pink coloring and use dark chocolate chips or chocolate drizzle.
Strawberry Cookie Dough: Add strawberry powder to the dough for a fruity twist.
Holiday Theme: Swap the pink coloring for red, green, pastel, or another color that matches the occasion.
Extra Sparkle: Finish the bites with sanding sugar, sprinkles, or edible glitter.
Serving Suggestions
Arrange the bites on a dessert platter for parties or school events.
Serve them with cold milk, hot coffee, or tea.
Add fresh strawberries or raspberries for a fruity contrast.
Place each bite in a mini cupcake liner for bake sales or gift boxes.
Storage Tips
Store the brownie bites in an airtight container in the refrigerator for up to 4 days. Let them sit at room temperature for about 10 minutes before serving for a softer texture.
For longer storage, freeze the unglazed bites in an airtight container. Thaw them in the refrigerator, then glaze and decorate them before serving.
Frequently Asked Questions
Can I make these ahead of time?
Yes. The bites can be assembled and refrigerated up to one day in advance. You can also prepare the brownies and cookie dough separately, then assemble and glaze them before serving.
Can I use a boxed brownie mix?
Yes. A boxed brownie mix can save time, although the color and texture may vary slightly from the homemade version.
Do these contain raw eggs?
No raw eggs are used in the cookie dough. The eggs are only used in the brownie layer, which is fully baked.
Do I need a half-sphere mold?
No. A small cookie scoop and your hands work well for shaping the cookie dough. Simply roll each portion and flatten the bottom slightly so it sits securely on the brownie base.
Final Thoughts
That night ended with an empty tray and a few recipe requests scribbled on sticky notes. Watching my kids sneak back for seconds made the extra steps feel worth it. These brownie bites are playful without being over the top, and they fit neatly into real-life schedules.
Some recipes simply show up at the right time. This one did—and it did not last long.
Did you make this recipe? Mention @theallgal or use #theallgal so we can see your creations. Let us know which colors or fun toppings you used to make them your own!
This post may contain affiliate links. We may earn a commission when you purchase through links on this site at no additional cost to you.


